Samba and macOS Time Machine
June 23, 2023 - 5 min read (995 words)
Apple hardware often outlives the lifespan of the operating system software that runs it if taken care of. I had a ten year old Mac desktop based on Intel hardware which was reaching the end of operating system support. As new feature for the ecosystem started to come out, the usefulness of the system diminished so it became time for it to have a new life: as a Linux machine.
The system specs were impressive for the era in which it was purchased:
- Intel i5-4570 (4 core) @ 3.600GHz
- NVIDIA GeForce GT 755M Mac Edit
- 16 GB RAM
- 1 TB Hard Drive
Great utility could still be derived from this system using a different operating system so I installed a recent version of Ubuntu Linux (Ubuntu 22.04.2 LTS x86_64). The first order of business was to make it useful to rest of the current home ecosystem.
While iPhones and iPads will backup to iCloud, macOS will not at the time of this writing. The backup technology (Time Machine) requires either a NAS or another network storage system to backup accross a network.
Thankfully, one of the supported protocols is a SMB share per the support article on backup disks.
Table of Contents
Samba Installation and Configuration
Linux supports the SMB protocol through a service called Samba. Its installation on modern Linux distributions is straight forward.
Samba Installation
Start by updating the apt registry:
sudo apt update
Hit:1 http://us.archive.ubuntu.com/ubuntu jammy InRelease
Get:2 http://security.ubuntu.com/ubuntu jammy-security InRelease [110 kB]
Get:3 http://us.archive.ubuntu.com/ubuntu jammy-updates InRelease [119 kB]
...
Fetched 4,279 kB in 1s (3,882 kB/s)
Reading package lists... Done
Building dependency tree... Done
Reading state information... Done
26 packages can be upgraded. Run 'apt list --upgradable' to see them.
Then install the samba package:
sudo apt install sambaSamba Configuration
The Samba configuration exists at /etc/samba/smb.conf.
This configuration requires three VFS modules:
vfs_catia provides illegal character translation to correctly map Apple paths.
vfs_fruit is the primary module used to enable compatibility with Apple SMB clients
and vfs_streams_xattr enables storing NTFS alternate data streams in the underlying
file system.
Per the vfs_fruit
documentation:
The module should be stacked with vfs_catia if enabling character conversion and must be stacked with vfs_streams_xattr.
Additionally, the optional parameter fruit:nfs_access must be set to no to
allow Samba to manage file and directory permissions. Without this option set,
Samba is unable to manage permissions itself using create mask,
force create mode, directory mask, force directory mode or
inherit permissions directives.
To edit the configuration using vim execute the following command.
sudo vim /etc/samba/smb.confThe following section needs to be added to the [global] section of
the configuration file. It establishes the file system extensions
and protocol versions necessary to support macOS.
### Time Machine Compatibility ###
min protocol = SMB2
vfs objects = catia fruit streams_xattrfruit:nfs_aces = nofruit:metadata = stream
fruit:model = MacSamba
fruit:posix_rename = yes
fruit:veto_appledouble = no
fruit:wipe_intentionally_left_blank_rfork = yes
fruit:delete_empty_adfiles = yes
server min protocol = SMB2
Add the following to the end of the file to create a dedicated share for time machine backups:
[backupshare]
comment = Apple Backup Shared Folder
path = /mnt/samba/applebackups
fruit:time machine = yesforce user = smbuser
force group = smbgroup
read only = no
browseable = yes
create mask = 0664
force create mode = 0664
directory mask = 0775
force directory mode = 0775
WINS Support
By default, Samba relies upon NetBIOS
broadcasts within a subnet to declare availability of shares to a small group of
network nodes. This works well for most home networks. However, if your home network
involves multiple subnets or routed segments shares will not be visible to all clients.
NetBIOS broadcast are not route-able. To allow routed segments (e.g VPN clients) to
discover shares, use a WINS
configuration. Add the following lines to the [global] section of the smb.conf:
### WINS Support ###
wins support = yes
dns proxy = yes
Create Dedicated Samba User and Group
Create a user and group to match the configuration.
sudo addgroup smbgroup
sudo adduser --system --no-create-home smbuser smbgroup
Create Share Folder and Change Ownership
Create a folder to store the share and match the configuration.
cd /mnt
sudo mkdir samba
cd samba
sudo mkdir applebackups
sudo chown smbuser:smbgroup applebackups
Start the Service
Run the following commands to start the service and check its status.
sudo systemctl start smbd
sudo systemctl status smbd
Create Dedicated Samba User and Group
Create a user and group to match the configuration.
sudo addgroup smbgroup
sudo adduser --system --no-create-home smbuser smbgroup
Create Share Folder and Change Ownership
Create a folder to store the share and match the configuration.
cd /mnt
sudo mkdir samba
cd samba
sudo mkdir applebackups
sudo chown smbuser:smbgroup applebackups
Start the Service
Run the following commands to start the service and check its status.
sudo systemctl start smbd
sudo systemctl status smbd
Complete Configuration
The complete example configuration file can be found here.
macOS Settings
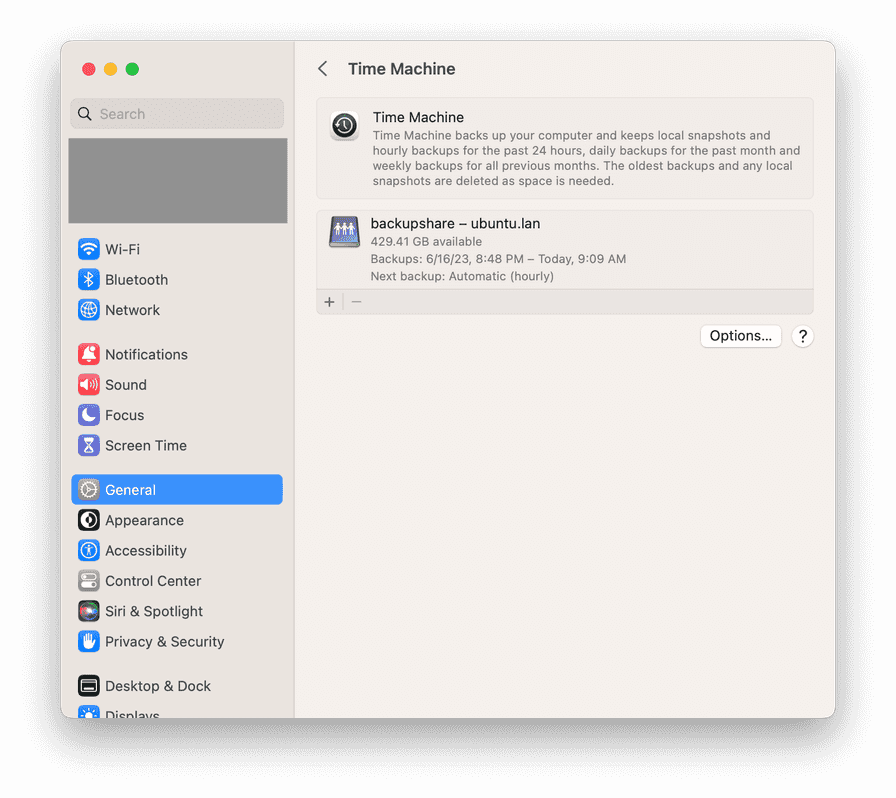
In macOS, choose the Apple menu > System Settings, click General in the sidebar, then click Time Machine on the right. Once on the settings pane, click the add button to open a dialog to select the network share configured in Samba.

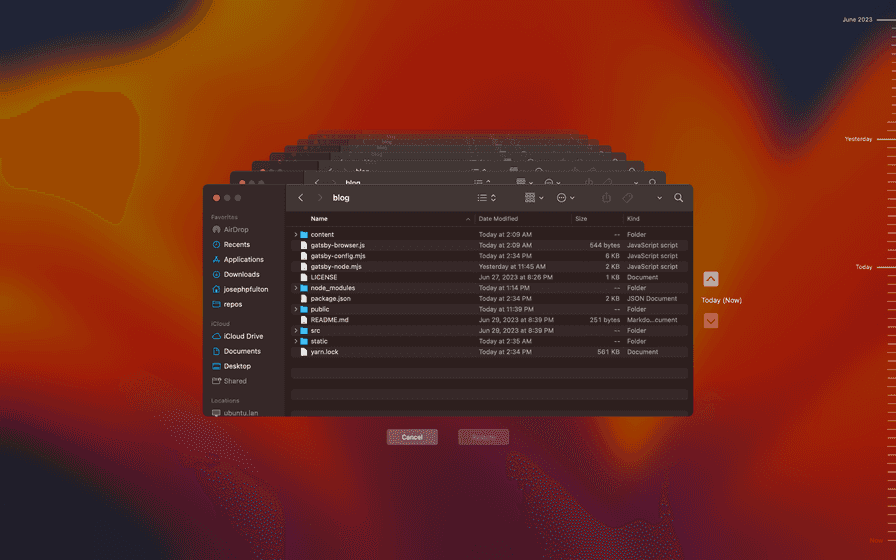
After setting up the disk, you may use the time machine icon at the top of the screen to observe the progress of the backup, directly access the settings or browse the backup contents.
Browsing the backup offers a powerful feature where through a Finder window the user may observe folders and files across the lifetime of the backup set.


Written by J. Patrick Fulton.